VALENTINE'S DAY CAKE POPS
- Sam

- Jan 30, 2019
- 5 min read
Updated: Dec 28, 2023
INGREDIENTS
¼ Red Velvet Cake
3-4 tbs Cream Cheese Frosting
Lollipop Sticks
White Chocolate or just melting chocolate without the shortening
Vegetable Shortening
Box, Styrofoam something to stick them in when they dry
INSTRUCTIONS
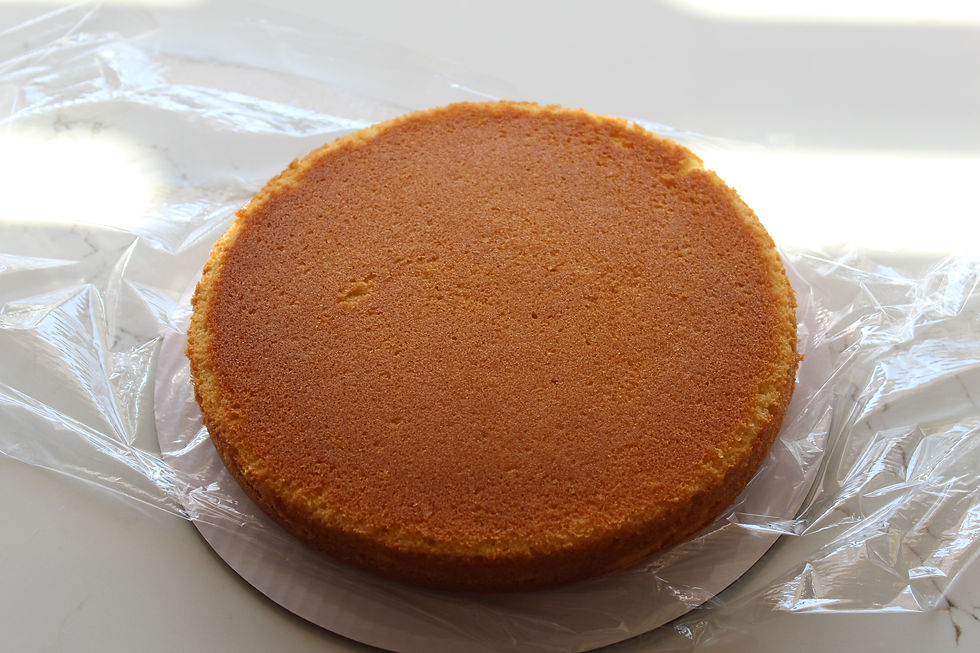
The first thing you want to do is line your pan with parchment paper and spray with nonstick spray or butter. Then mix together your red velvet box cake mix and pop it in the pan. Bake it according to the box instruction and let cool.
Next, crumble your cake in a bowl. I know that looks like Hot Cheetos but I swear it is the cake haha. I used a ¼ of the cake.
I added mini chocolate chips for fun, you can skip that if you want. You also need to add your frosting one tablespoon at a time. The reason you need to add slowly is that the cake can very quickly get too sticky. The consistency you want is "dry" but also not crumby. In the end, I used 3 tbs to get the right consistency for ¼ of the cake.
I popped them onto a lined baking sheet once I rolled them up. Then, put them in the fridge for an hour or so. I researched this part a bit but in my experience, refrigerating was helpful.
Then you need to melt your chocolate. You can either do the double boiler method or use a melting pot specifically for chocolate.
I used regular chocolate chips instead of melting chocolate. With regular chocolate chips, I find it helpful to add vegetable shortening to get a good consistency for dipping.
So if you are going to use the double boiler method, you need to get water in a pot. Then grab a heat safe bowl and place it over the pot, make sure the water is not touching the bowl. Then get the water boiling and place your chocolate inside the bowl, stirring often. If you are using chocolate chips, you want to add the vegetable shortening now. Once the majority of the chocolate is melted you can take it off the heat.
Let the chocolate cool down a little a melt completely. Try and put the chocolate in a bowl or cup that you can dunk the cake pop in softly. This part is where you might face struggles if the consistency of your cake pop is wrong. The cake pop may fall off in the chocolate or the stick will go right through the cake. This is a problem with your consistency. Don't stress, just go back and add more cake to the mixture. This is another reason I don't use the entire cake.
For my white chocolate, I had to do 2 coats because the red velvet still peaked through after one.
Before the chocolate hardens you want to add your sprinkles and decor.
For them to harden you have to either stick them in the leftover cake, styrofoam, cardboard or whatever you can to make them stand. I find putting them in the fridge is also the quickest way to get them ready to eat.
Once they harden they are ready to enjoy!
These cake pops are one of the three different ones I made. I have another blog post called “cake pops 3 different ways”. If you want to see a lemon poppy seed or chocolate chip cookie dough cake pop recipe head on over to that post.
This post is all dedicated to the red velvet cake pops. These are delicious and very simple to make. Although they are simple, give yourself time to really perfect them. It can be a finicky recipe to work with. I will get into that below!


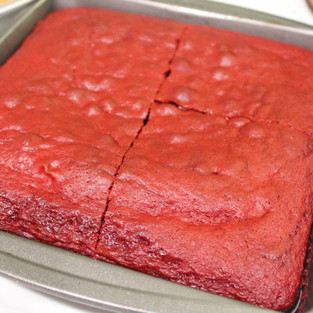
First thing you want to do is line your pan with parchment paper and spray with nonstick spray or butter.
Then mix together your red velvet box cake mix and pop it in the pan.
Bake it according to the box instruction and let cool.


Next, crumble your cake in a bowl. I know that looks like Hot Cheetos but I swear it is the cake haha. I used a 1/4 of the cake.
I added mini chocolate chips for fun, you can skip that if you want. You also need to add your frosting one tablespoon at a time. The reason you need to add slowly is that the cake can very quickly get too sticky. The consistency you want is “dry” but also not crumby. In the end, I used 3 tbs to get the right consistency for 1/4 of the cake.
I popped them onto a lined baking sheet once I rolled them up. Then, put them in the fridge for an hour or so. I researched this part a bit but in my experience, refrigerating was helpful.


Then you need to melt your chocolate. You can either do the double boiler method or use a melting pot specifically for chocolate.
I used regular chocolate chips instead of melting chocolate. With regular chocolate chips, I find it helpful to add vegetable shortening to get a good consistency for dipping.
So if you are going to use the double boiler method, you need to get water in a pot. Then grab a heat safe bowl and place it over the pot, make sure the water is not touching the bowl. Then get the water boiling and place your chocolate inside the bowl, stirring often. If you are using chocolate chips, you want to add the vegetable shortening now. Once the majority of the chocolate is melted you can take it off the heat.
Let the chocolate cool down a little a melt completely. Try and put the chocolate in a bowl or cup that you can dunk the cake pop in softly. This part is where you might face struggles if the consistency of your cake pop is wrong. The cake pop may fall off in the chocolate or the stick will go right through the cake. This is a problem with your consistency. Don’t stress, just go back and add more cake to the mixture. This is another reason I don’t use the entire cake.
For my white chocolate, I had to do 2 coats because the red velvet still peaked through after one.
Before the chocolate hardens you want to add your sprinkles and decor.


For them to harden you have to either stick them in the leftover cake, styrofoam, cardboard or whatever you can to make them stand. I find putting them in the fridge is also the quickest way to get them ready to eat.


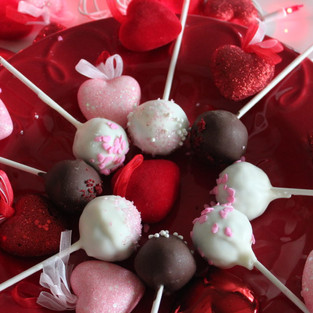


The actual fun part is the decoration and presentation! If you plan on giving these as gifts I would highly recommend standing them up in something or wrapping them together with ribbons.
To stand them up in a pretty way, I would grab a glass jar with a wide mouth or opening. Fill it with granulated sugar and stick your cake pops in. You could even color the sugar a light pink with food coloring.
Another way is to wrap the cake pop part in a little bit of saran wrap and tying it with a cute ribbon around the base of the cake pop.
I hope you guys found this post helpful and something you can make for your loved ones this Valentine’s Day.
Let’s keep catching the wave 🌊 I love you guys for supporting me and catching the wave with me every week! 💗


Comments